Quick start guide |
This document
covers the following areas
Since the harness
is a GUI application, some X-window or Window server is required,
unless you choose to use only the command line interface to the
harness.
Whether the harness runs on NT or Solaris or any other platform (or all
of them) depends on how portably the tests are written.
e.g.
java -classpath ./qat.jar ClassName
orsetenv CLASSPATH /home/user/qat.jar
java <ClassName>If you are using Windows and have installed Java 1.2, you can double click the qat.jar file to directly launch the QAT GUI interface, or via commandline using
the form : java -jar qat.jar
java Agent port number> [debug level]Any temporary or other such files created by the agent will be placed in the directory {user.home}/.qat/agent.where
port number = the port which will be used for communicating / transferring files to and from the harness
debug level = the debug level (0..10) to control which, if any, messages are sent to the stdout and stderr streams of the Agent (default value is 0)
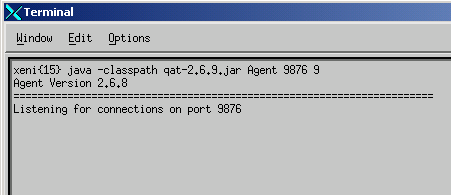
To kill the agent, simply type Control-C in the terminal window to send a KILL signal to the JVM.
Note: Each agent
requires a unique port number, but one or all of the agents may be run
on the same machine as the harness.
Each agent, however, has to be run in a separate JVM.
Furthermore, one agent may be used by as many harnesses as required, so
instead of two separate agents, you may configure your test to use the
same agent.
In this case, be sure to ensure each agent uses a unique temporary
directory to store it's files, by making use of the RANDOM script
command when you call SETAGENT to prevent agents messing with
each others files.
No windowing system is required by the agent.
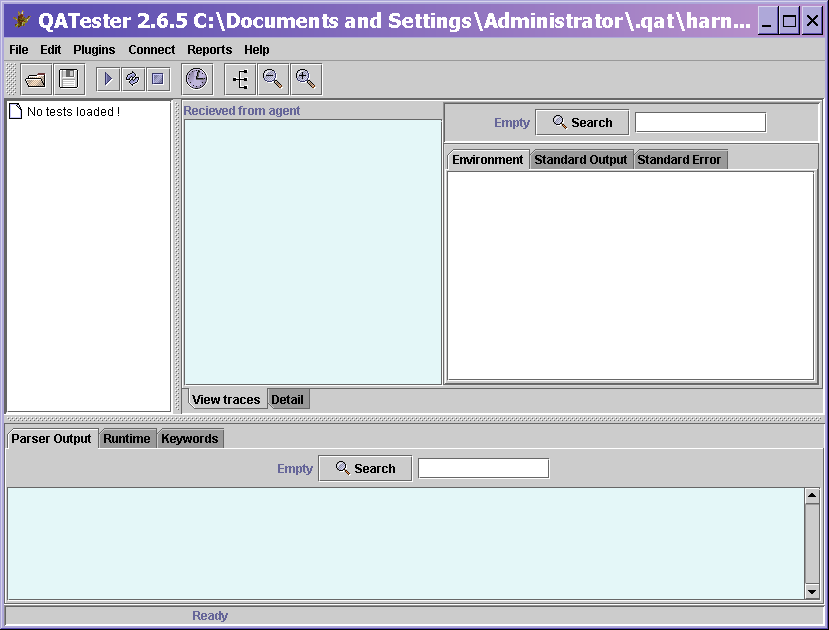
java QAT [language]The language option currently only supports French (-FR) and Afrikaans (-AF), and if omitted, defaults to English.
You will now see
the screen displayed in Figure 1.
|
Let's use the
example tests provided with this tool in the examples directory, and
set up some tests to run on Solaris and NT.
There are three steps to set up the harness to run the examples.
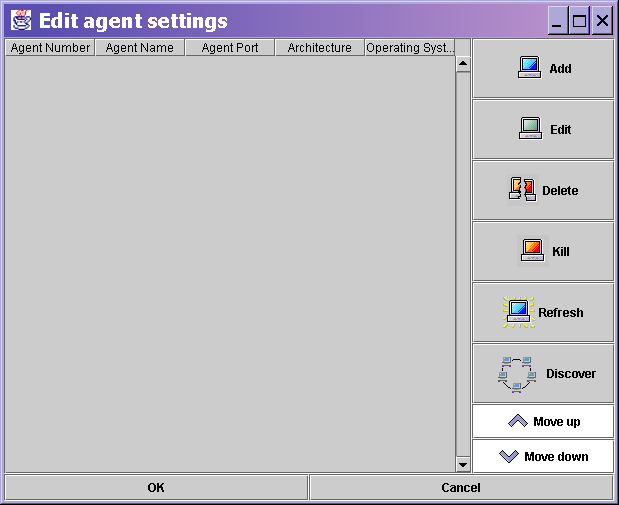
From the system menu, select Edit -> Agent Settings.
This will display the window displayed in Figure 2, with which you can graphically configure your agents.
Initially there are obviously none, so select the "Add agent" option, and fill in the machine name and port number. The port number is the same value you used when starting the agent as outlined in the above section Starting an Agent.
If the agent is currently running, you can click on the "Detect" button to automatically fill in the "Architecture" and "Operating System" fields.
The "Agent number" is used within your test scripts to differentiate between the different agents.
Any agents defined here are accessible in the .qash files as agent1.name,agent2.port etc. This will be covered in more detail later.
Figure 2
Now we have our agents defined, we need to set up our project for the first time.
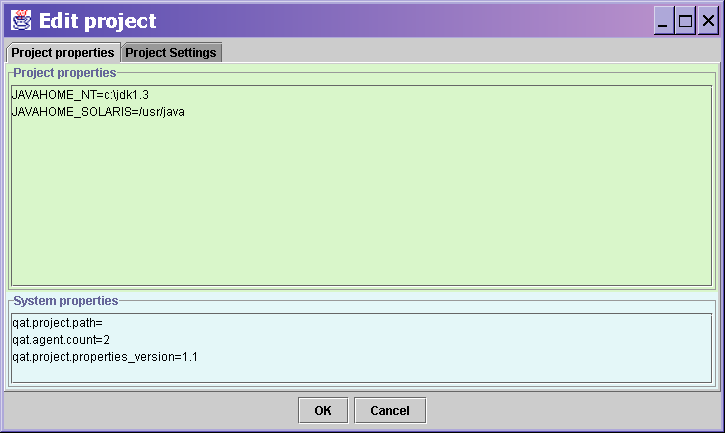
From the system menu, select Edit -> Edit Project to bring up the Project settings window.
You will see a blank text area - this is where you define specific properties for your test suite.
Ensure the following two properties are defined and correct for your particular system :
| JAVAHOME_SOLARIS=/usr/java1.2 JAVAHOME_NT=c:\jdk1.2.1 |
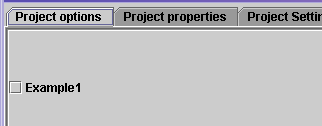
So your project
properties should look something like Figure 3
:
 |
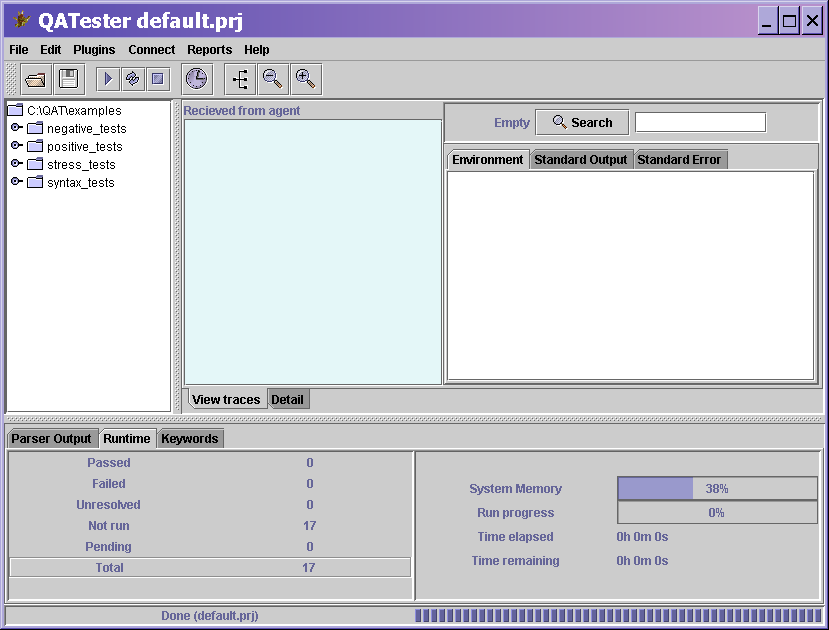
Once selected, choose OK to load all the tests in the selected examples directory :
You should now see
a tree structure similar to Figure 4 :
 |
To change which
agents to use, simply edit the relevant agents from the system menu
"Edit"->"Edit agents" until you have the configuration you want.
In this way you can build up different test scenarios using the project
Save As option.
For more details on
how to use the GUI interface, you should now be ready for the QAT Harness Manual.
If you are ready to write your own tests, you can go directly to the QASH Syntax page.
This will produce a CheckBox called Example1 with default value of unchecked. The tooltip text will be set to the complete variable name.qat.project.guiproperty.checkbox.Example1=false
This will produce a TextField called Example2 with text containing "Hello World". The tooltip text will be set to the complete variable name.
qat.project.guiproperty.textfield.Example2=Hello World
This will produce a ComboBox called Example3 with selected item "a", and possible values of "a" through "g". The tooltip text will be set to the complete variable name.
qat.project.guiproperty.combobox.Example3=aIf any GUI properties are detected in the project properties, or added by editing the project properties, the next time the project properties window is displayed, a new tab will appear displaying by default these properties as GUI components.
qat.project.guiproperty.combobox.Example3.values=a,b,c,d,e,f,g
If the OK button is selected, the value of the GUI components is accepted as the required value, however if the text version tab is currently being displayed, the text version of the properties (which are still displayed) will be taken and will override any GUI properties.
java -classpath {qat.jar} QAT -cmdline -project {projectFileName} [-reportdir {reportDirectory}] [-rescan] [+keyword keyword1] [-keyword keyword2]-cmdline - indicates we want to launch the harness in commandline mode only
-project {projectFileName} - mandatory parameter specifying the full path to a QAT project file for the specified test run
-reportdir {reportDirectory} - optional parameter which is the full path to the directory in which to store the generated html report of the test run. The directory must already exist. If this parameter is omitted, no report will be generated.
-rescan - optional parameter, if specified, the QAT will perform a complete rescan off disk in case new tests have been added since the project was last parsed.
+keyword {keyword} - all tests containing this keyword will be selected for the test run
-keyword {keyword} - all tests containing this keyword will be excluded for the test run
The [(+/-)keyword] parameter may be repeated several times. If no +keyword or -keyword is found, all tests in the project will be run.
java QASHParser sessionName propertiesFile test1Path test2Path .... testNPathsessionName - the number of this run, which will be used to store the results retrieved from the agents under the correct offset in the QAT home directoryThe exit code will be zero if no errors occurred, or non-zero if one or more errors occurred.
propertiesFile - a properties file containing all the variables required to parse the tests to be run. You may pass the name of a previously saved project file if you don't want to reconfigure one by hand.
testXPath - this is the full path to each QASH file to be run.